Microcement DIY with Festfloor Go! Color: FF7035 [photos]
Light gray is one of the most frequently chosen microcement colors. Of course, there are plenty of shades of gray, but the Festfloor Go! FF7035 Light gray has been our absolute bestseller for a long time! This is the color that was also chosen by our client Monika Niestrawska for her DIY microcement project.

Microcement DIY
Mrs Monika decided to make the wall and the floor in the bathroom in her new home by herself. She ordered ready-to-use Festfloor Go! microcement kit along with substrate reinforcement kit and after reading the technical sheet and videos on our YouTube channel, she started works.

Bathroom with light grey microcement
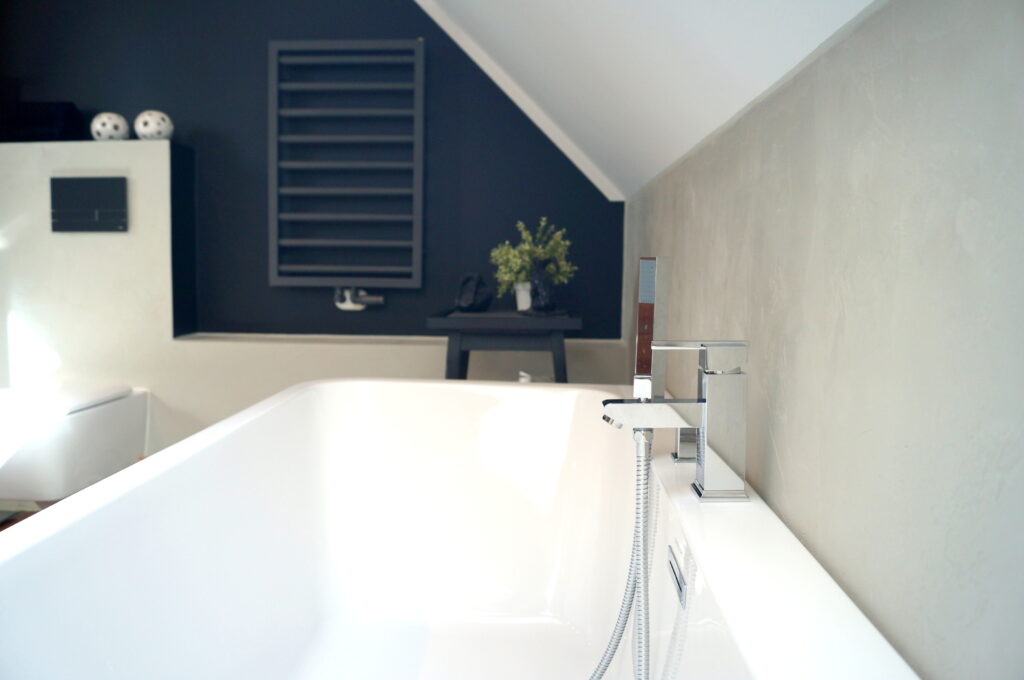
The bathroom is quite minimalistic, there are no unnecessary equipment or accessories. Uber stylish modern bathroom in grey, white and black – simply ravishing! The bathroom has a large free-standing bathtub. In the wet zone around the bathtub, Mrs Monika used microcement, and in the rest of the room – dark brown wooden panels. The roof window above the bathtub is a big advantage of the bathroom. Thanks to it, a lot of light enters the room, and the microcement takes on a slightly different shade at any time of the day, constantly delighting everyone who enters the bathroom.
Mrs. Monika shared photos of the (almost) finished bathroom with us and we took the opportunity to ask her some questions on this occasion.

Why did you decide to use Festfloor microcement in the bathroom?
I decided to use Festfloor microcement for several reasons:
Having an artistic and design education, during the construction and finishing of the house, I was looking for solutions that would be durable, comfortable to use and of course beautiful. I wanted an unusual bathroom finish that would easily replace the use of classic tiles.
Due to the fact that my house is built in a timber-frame technology, I was looking for a tight solution for wet rooms, which would exclude joining materials in sensitive places exposed to water and moisture, such as corners and it could also be used for underfloor heating.
Another issue in favor of the use of microcement was the desire to combine two different materials on the floor in the bathroom without jointing strips.
I needed a material that, depending on the method of application and sanding, would look different in every place, while maintaining color consistency.
I wanted to achieve the effect of a monolithic surface, which will look different depending on the time of day and lighting. When using tiles, the effect of depth, smoothness, porosity or color difference cannot be achieved. With Festfloor microcement, definitely yes.
I was looking for a durable material that I could renew, give a different structure or change color in the future without major construction work.
After the difficult adventures with bathroom contractors on the ground floor of the building, using tiles, I was looking for a solution that I would implement myself from start to finish – my husband only watched at various stages of the work and was actually afraid of the end result. However, of course he liked the final effect of the work. I believe that not everyone would be able to deal with the microcement. Let me mention that the room is not finished yet – there is no furniture, etc.
I wanted to achieve the effect of a delicate concrete, light, which will not be too harsh and will match the colors of the stoneware floors on the ground floor. I think I managed it.

How many square meters have you made? How long did your microcement works take? Did anyone help you or did you do everything yourself? What was the cost of the project?
The surface of the walls and floor covered with microcement is approx. 15 m2. The work took me about a month – except that I did it after my daily work hours, so that’s why it was so long.
If I had only devoted my time to making the bathroom, I think it would have been much shorter. It took me a long time to prepare the substrate.Waterproofing the bathroom, applying bonding bridge with mesh.
I did all the work, i.e. waterproofing, coats, painting walls, leveling the floor, applying bonding bridge, applying microcement and sealing myself. My husband hung up the lighting and bathroom accessories and helped with the arrangement of the wood-like panels. I entrusted the installation of sanitary facilities to a plumber. The furniture will be made by a carpenter, but this is a plan for the future.
As for the costs, the cost was similar to the use of tiles.
The rest of the costs are the same as for a typical solution with the use of ceramic or porcelain tiles.

What advice could you give to people who are considering applying microcement in their home on their own?
If someone would like to make a microcement in their own home, they must meet the temperature and humidity requirements and apply everything in accordance with the attached instructions and with the suggested time intervals between applications. However, as I mentioned earlier, I think that not everyone can handle this material. You must have some experience in construction or manual or artistic work. Spatial imagination will also be useful, as well as a design or plan of what and with what tools we want to get. Microcement allows for a lot, but requires skill and a steady hand. It gives incredible satisfaction and pleasure during application and sanding, and the end result pleases the eye.

How do you rate the microcement after several months of use? What are the pros and cons of microcement in the bathroom?
After a few months of use, I think that I chose the product well. Fest Cleaner is a good product to keep microcement clean, but so are other standard cleaning products. It perfectly conducts heat from underfloor heating (read also: Microcement with underfloor heating: how to do it right). For comparison, a tile is cooler by 1 degree, and a wood-like panel by 1.5 degrees. It is easily dusted and washed off. The microcement is water-resistant. It is hard and durable. There are no joints where dirt could settle and you get a smooth seamless surface.
I am looking forward to do another microcement project.


If Mrs. Monika’s work inspired you to start your own microcement DIY project, first of all, read the technical sheets of the products, watch the videos on our YouTube channel and read the following articles:
- All about microcement – Frequently Asked Questions (FAQ)
- The most common mistakes when applying microcement
- Microcement wall – DIY
- The microcement checklist. 5 things you need to do before starting microcement application
- Microcement tools and accessories: all you will need
You can also sign up for microcement training. However, if you prefer to outsource the implementation to professionals, check out our guide on how to choose a good microcement contractor.